George's Bread Machine Patch
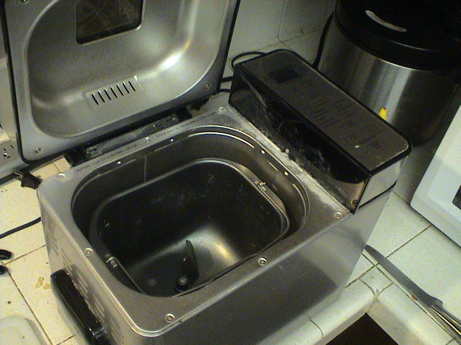 I bought this Cuisinart BMKR-200 Bread Machine at Costco just after Christmas of 2010 for about $70. I needed another electric kitchen gadget like a hole in the head, but I had given my oldest son one for Christmas and we liked it so much, I went back to Costco and bought one for myself.
The thing basically mixes, kneads, rises and bakes fresh bread all in one pan pretty much automatically. All the user really has to do is to add the right ingredients, pick some simple option for bread type, loaf size and desired crust and then let it rip for about 4 hours.
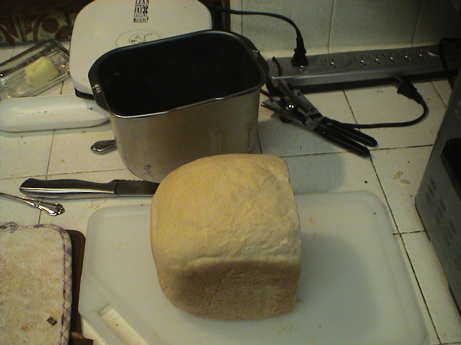 What you get is a loaf of steaming hot bread. Sometimes these loaves do not survive long enough to actually cool down.
However, a problem showed up about 8 months and 75 lb. of bread flour later. It became more and more difficult to get the pan out of the bread maker for each of the dozen or so loaves before I declared a problem. The bread pan was hanging up on something inside that wouldn't let it go.
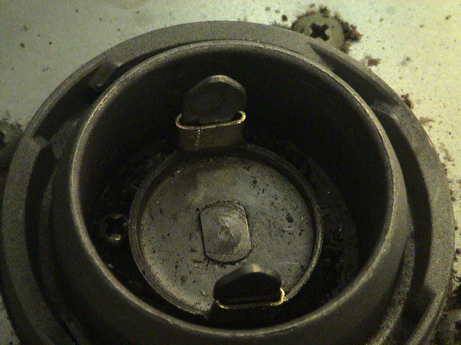
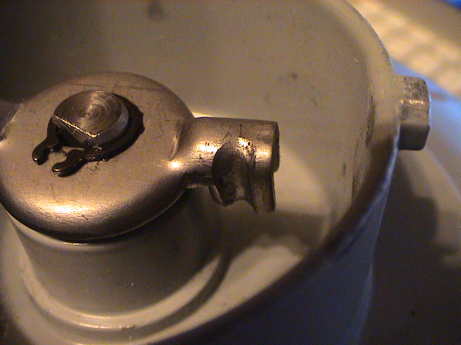 The problem is that a groove was being worn in both arms that extend from the bottom of the bread pan. That groove was not there when it was new. It is worn about 2/3 the way through the steel arm.
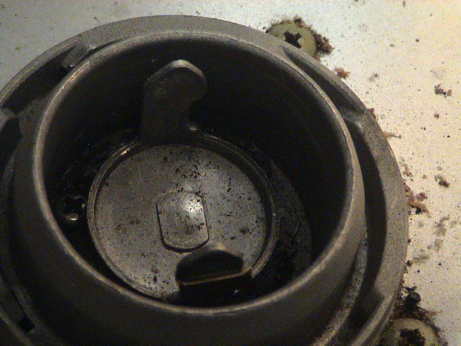
The arm drives a shaft that goes through the bottom of the bread pan and drives a paddle that actually works over the loaf. These arms are, in turn, driven by two tines on that are connected to a shaft to a motor down inside the bread maker itself.
 I don't know if these similar grooves were in the tines that come upward from the paddle drive mechanism when it was new, but I suspect that they were not there. As the grooves got deeper, I could not rotate the pan enough while unlatching it to allow the arm to get by the new lip at the top of the tine and the thing would hang up. On the last loaf, it took maybe 15 minutes of wiggling, banging and cursing before it finally released. If I tried to bake another loaf, I may have never got the damn thing out.
I did contact customer service via email from a link on the Cuisinart web site. I sent them a picture of the worn arm and they offered to ship me a new bread pan at no charge. This is good service. The new pan hasn't arrived as of this writing, but it occurred to me that the new one would probably just wear like the old one and, further, the tines on the bread maker itself would wear more and the whole thing would be useless.
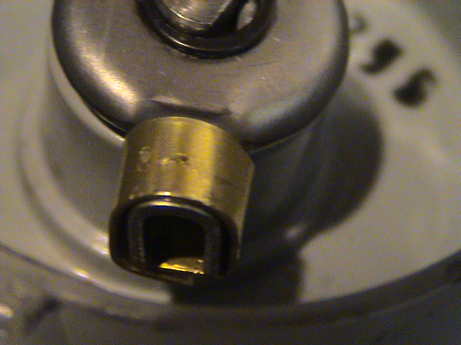
So I elected to create a patch. Since this whole assembly gets very hot (something like 400°F) during baking, any form of plastic, rubber or adhesive were out of the question. I elected to reface both the arms and tines with brass strip stock cut and bent to fit by hand. The stock I used is 0.025" x 0.250" brass strip stock. I picked this material because it was the first piece that touched my hand when I dove into my scratch build materials box. This material is available at most hobby shops that sell model trains, RC boats, airplanes or cars.
It took two passes to get the shapes and installation method right for both sides. But I baked the loaf in the photo above with the first iteration of the patch and besides that the first version of each kind of piece fell off before the loaf was finished, it worked. I then made two new pieces following the pattern of the 2nd version of each piece.
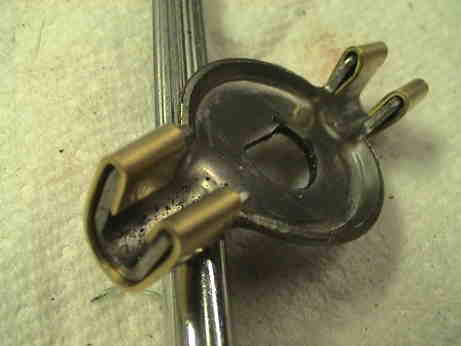
 The tines were patched with a piece that basically fit into the worn groove. I cut off a chunk of strip stock about an inch long and bent it with a pair of needle nose pliers to fit. I used a pair of gas pliers to help form it around the tines and finally squeezed it to shape with the needle nose pliers. Those things are on there, they won't come off until I elect to pry them off.
 The arms on the bread pan were formed by hand as well and bent with the same tools. The ends of the strip wrap underneath the arms and the pieces fit tightly.
Brass is softer than steel so that any more wear will be in the brass parts which are replaceable. I may have to patch the thing again a couple of times a year or maybe every 50 to 75 loaves, but at least the unit is patchable.
 That patch lasted for awhile, but eventually one of the brass pieces worked it's way off the end and fell off. To do this properly required that I find some snap ring pliers. It is possible to remove the snap ring that holds the rotor on with other tools, but it is much easier with actual snap ring pliers and it is much less likely that the snap ring will be mangled in the process. This set was on sale at Harbor Freight for $4 and it made the job much easier.
I reformed the brass pieces to pinch over the ends of the rotor tightly so that it will not work it's way off. It is also much easier to form the brass piece too. A hook is bent into one end of a strip and crimped in place over the rotor. It is then wrapped around the rotor and clipped to length, then the other end is bent over the rotor with needlenose pliers and crimped in place. This modification holds up much better.
This page has been accessed  times since 20 May 11
© 2011 George Schreyer
Created 27 Aug 11
Last Updated May 5, 2012